Patient Portal helps patients to view the clinical and ambulatory summary information, communicate with practice using secure messages, pay the bills, view appointments and submit health and other information to the practice using Patient forms.
Also the patient can view and download the account statements. The statements are listed account wise and only last statement generated for a particular account is shown. If a payment transaction is done against a particular account after the last statement is generated, then that account is not shown on dashboard. Maximum 5 accounts are shown in the list. “View all” link will display Statements page where all the account statements can be viewed using date filter.
Home
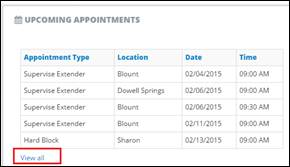
Once user logged in to the portal, Home page will be displayed. Home page will have information such as Upcoming appointments, recent messages, and navigation to the other options.

User Profile, Change Account Settings and Sign out options are also available.

My Profile will open the profile page allowing user to update the profile.
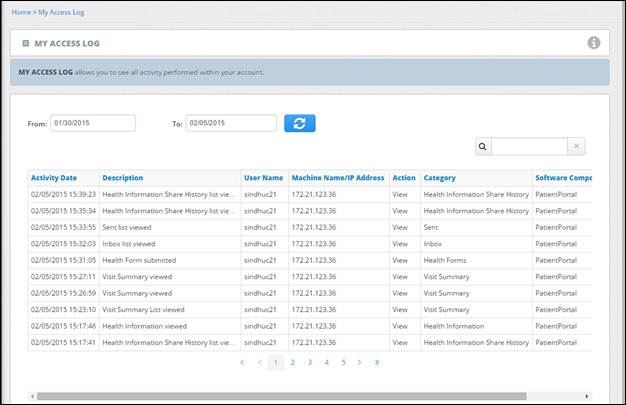
My Access Log will display the activities performed by the user on the portal as shown in below figure.

Change Account Settings allows user to change password, username and security details (question and answer).
When the user clicks the option a screen is displayed with password, username, security details in read-only format.

This screen has two sections:
1. Change password:
When user clicks on “Change Password” button, below screen is displayed with confirmation.

The above screen provides controls to enter current password, new and confirmation password.
On click of “Submit” button, the password is changed and user is redirected to login page.
2. Username and Security Information:
When user clicks on “Change Settings” button, below screen is displayed with confirmation.

The above screen shows controls to change User ID, Secret Question and Answer (which is case sensitive).
On click of “Submit” button, the details are submitted and user is redirected to login page.
Logout will logout user from Portal
My Messages
User can view the messages received from practice.
Inbox
User can view the inbox with the message that he received and click on view to open it.

Click Reply to send message as a reply to the same

Send
User can view all the messages that are send from portal in the send tab and view it

Health Information Share History
User can view all the health summary information which are shared and its status

Send Message
Clicking Send Message will give user four options to select which category the message has to be sent. Select any Option

Select the Message type that the user wants to send, enter the subject, message and click Send Message. User can reset the form or cancel the message

Message types available are:
- Ask a Provider
- Ask a Staff
- Refill Request
- Appointment Request
Detailed information can be submitted for “Appointment request” message type as follows:
1. Date: The user can enter appointment date.
2. Time: The user can select time slot.
3. Location: A dropdown list where the user can select practice location if available.
4. Visit Reason: The user can enter visit reason which is optional.

Once the user clicks Send Message, confirmation message will be shown to the user with Yes and No option. If “Yes” is clicked then the message is sent.
If session times out then user is asked for login credentials and after successful login the user can continue with his task.
Appointments
User can navigate to the Appointment page using three ways

Next from Left side navigation pane

Third by click View All from UPCOMING
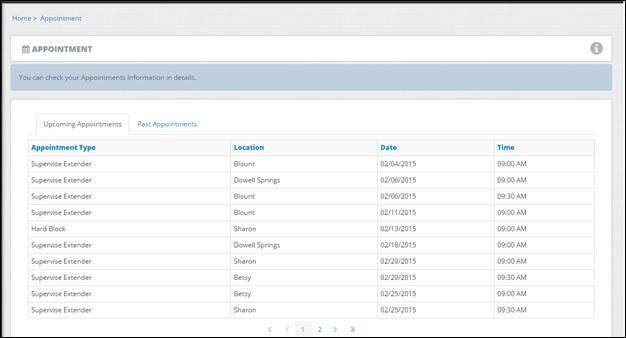
Appointment screen will show details such as Patients future appointments and Past appointments
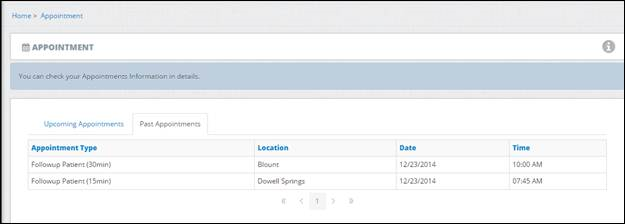
Past Appointments
Health Record
Click Health Record to view the patient Visit Summary and Ambulatory Summary.
Health Information will provide the Ambulatory summary and Visit Summary will give summary of the specific visit selected.
Health Information
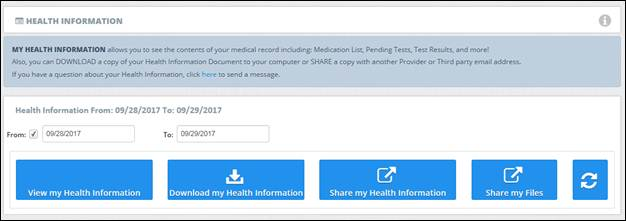
Click on Health record Drop down list and select Health Information
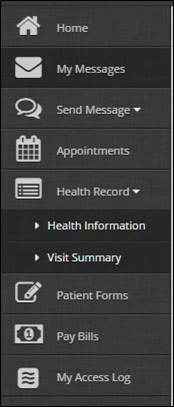
This will bring up the page where user can view, download and share the health information
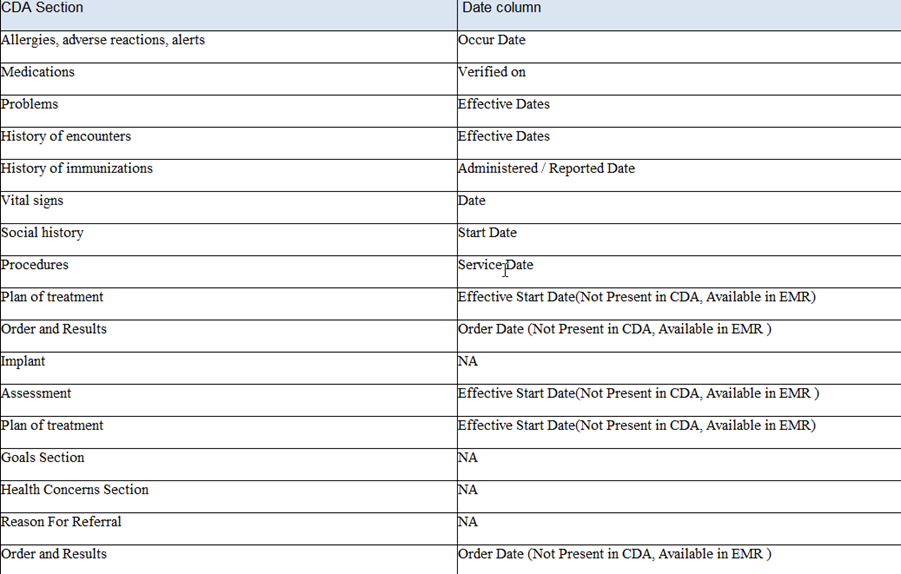
These are the date sections you can apply filters to in CDA.
View My Health Information
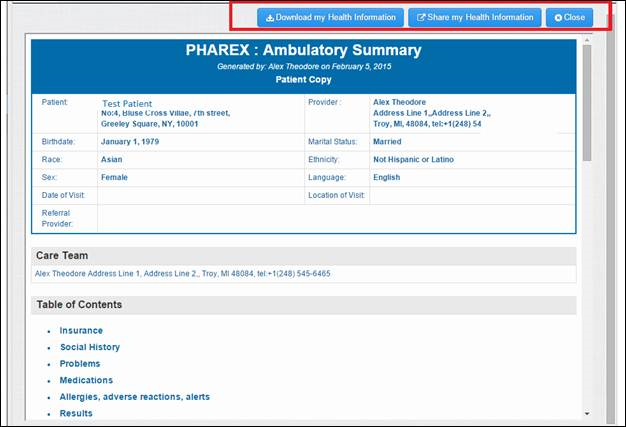
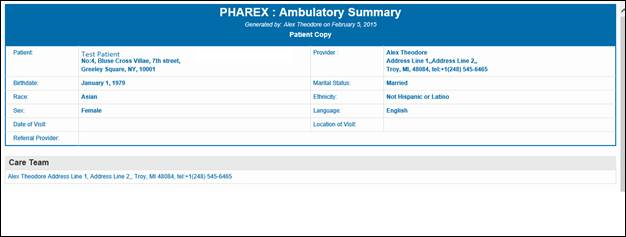
Click View my Health Information will open the Ambulatory summary of the patient
From the health record page itself user can download the summary and share the summary with other providers
Download my Health Information
Click Download my Health Information to download the summary.
Click Yes

This will download the ambulatory summary file in zip format which contains xml and the style sheet

Double click the xml file, It will open the summary in readable format.
Share my Health Information
Click Share my Health Information to share the summary.
Select “Share via Third party email address” to share the health information to a third party email address or “Share via Direct address” to share the information to a direct address.
Enter the Direct Address of the provider (only for direct address option), subject and message and click Share my Health Record.
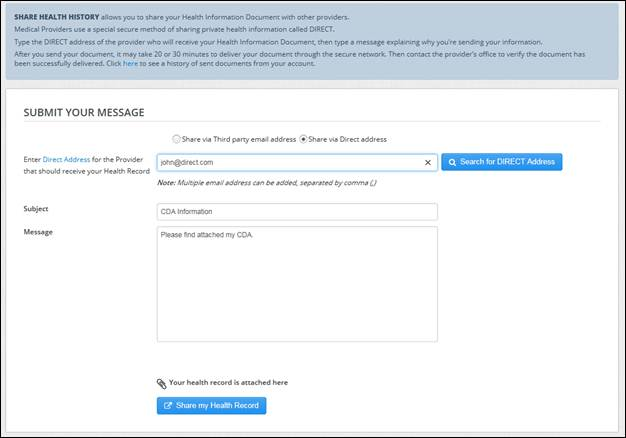
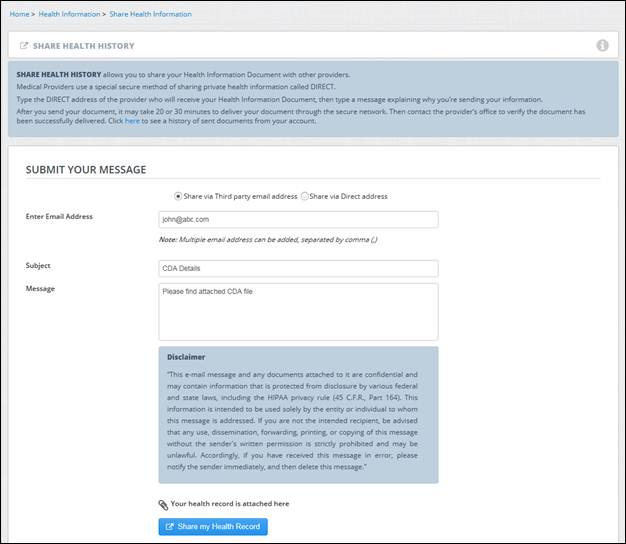
Click OK on the warning message

Once transmitted successfully, confirmation message will be displayed

The CDA shared can be viewed on My Messages > Share my Health Information tab
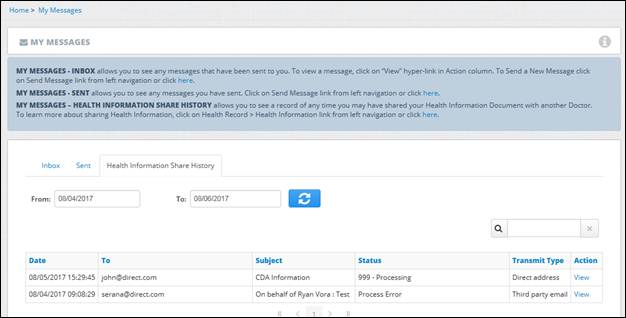
Share My Files
In share my files option, user is allowed to attach file manually and transmit the document to provider with direct address.
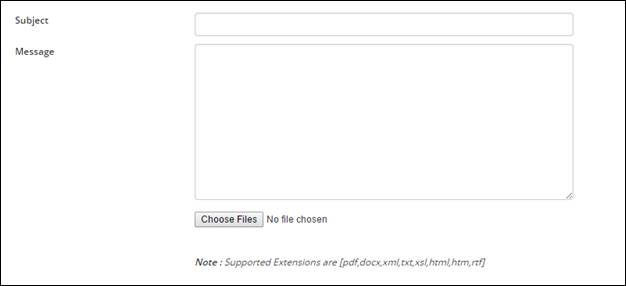
Visit Summary
Visit Summary will show the list of all exams which are sent to Portal from practice with the visit date
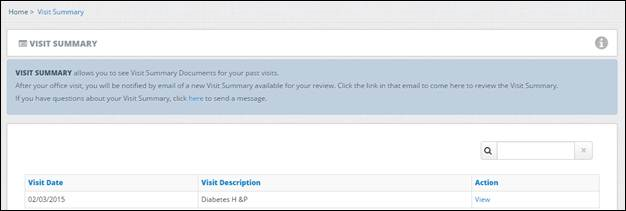
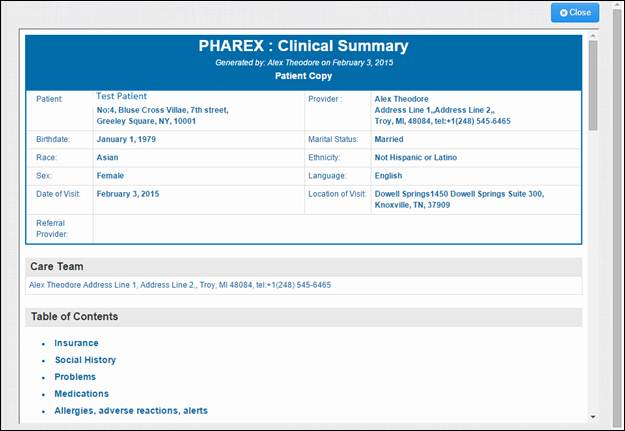
Click on View will open the Clinical Summary
Patient Forms
Patient can submit history and other information from portal itself using Patient form feature.
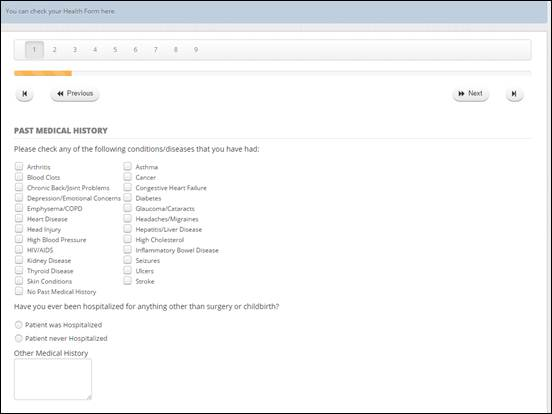
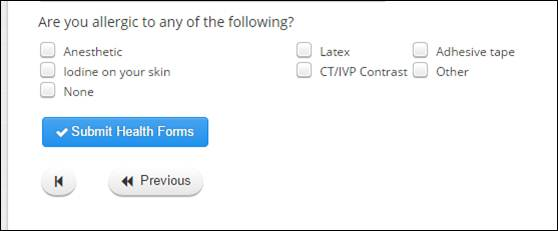
User need to fill out all pages information which ever required and click Submit
If session times out then user is asked for login credentials and after successful login the user can continue with his task.
View Statements
When the menu option “View Statements” is clicked on the left pane, the view statements page is displayed. The user can view all the statements generated account wise. In the below figure, by default last 60 days statements are displayed. The user can view maximum 60 days statements by selecting from and to date.
The “View” link on the right hand side shows the statement in a popup window and has an option to download it in pdf format.

Pay Bills
On Portal, a menu option “Pay Bills” is added on the left hand side menu. Click on this option to open the Pay Bills screen.
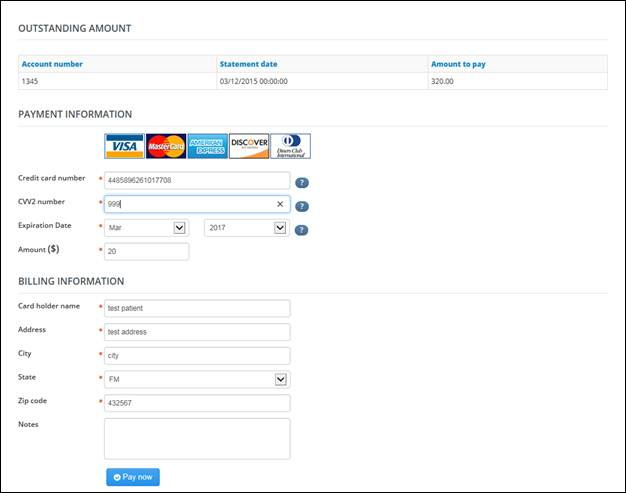
1. Following three sections are displayed on the screen:
– Outstanding Amount
– Payment Information
– Billing Information
2. Outstanding Amount section:
a. Outstanding Amount for the patient is displayed.
b. It includes all the patient accounts and charges.
c. This information is read only.
d. The statements will be listed account wise, only last statement generated for a particular account will be shown.
e. If a payment transaction is done against a particular account after the last statement is generated, then the account will not be shown in the list.
3. Payment Information section:
a. Card types supported are the following:
i. Visa
ii. Master Card
iii. Diners(Considered MC)
iv. Discover
v. American Express
b. It includes following information:
i. Credit Card Number
ii. Card CVV2 Number
iii. Card Expiry Date
1. It includes Month and Year dropdown list
2. Both information is mandatory
3. Month dropdown shows Jan to Dec
4. Year dropdown shows 2015 to 2025
iv. Amount
1. It is mandatory
2. It’s unit is dollars($)
3. It has two decimal places
4. Billing Information section: In this section the user can enter Card Holder Name, Address Line, City, State, Zip, Notes
5. At the bottom of the screen, a button “Pay now” is provided. On click of this button, transaction is processed.
6. If transaction is processed successfully, an email is sent to the patient.
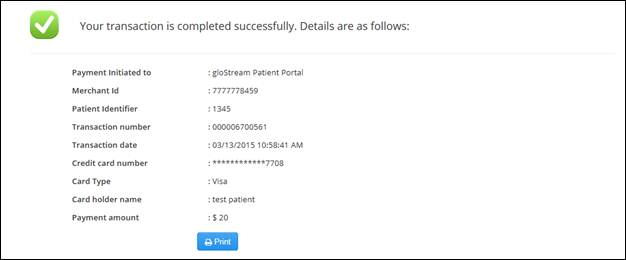
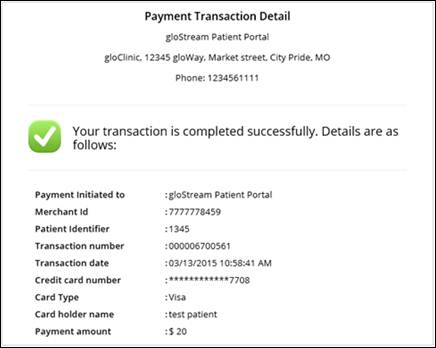
Successful transaction can be printed as shown below:
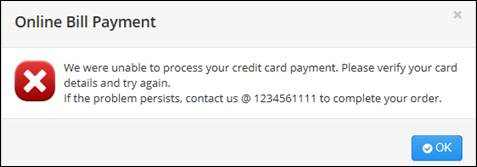
7. Failed transaction message:
My Access Log
My Access log display all information of what action was performed in portal along with date time, IP Address, user name etc.
Patient Representative
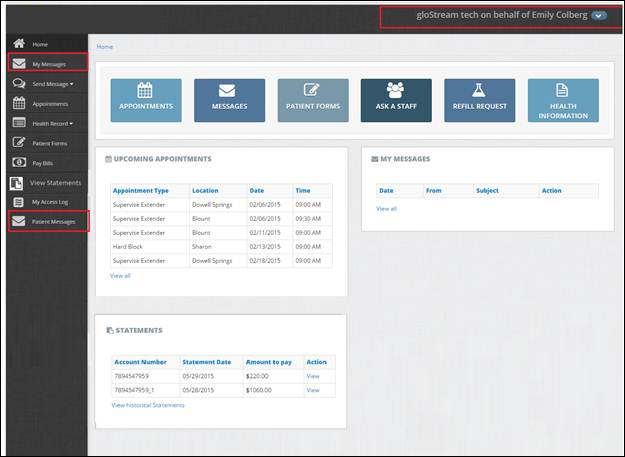
Patient’s representative can also login to the portal and view their patient’s health history and also can send message to transmit the health history to the provider on behalf of the patient
Patient Representative can login with username and password which will display the list of patients associated
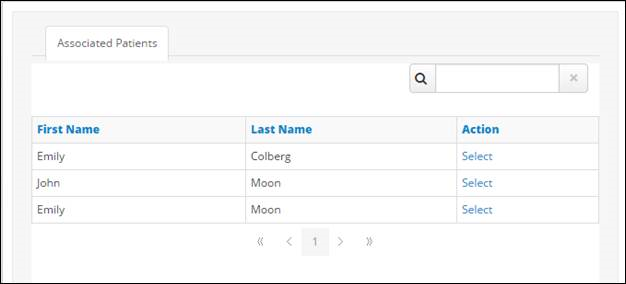
Select the Patient and he will have all the features of patient portal with addition of representative’s message box
PHI
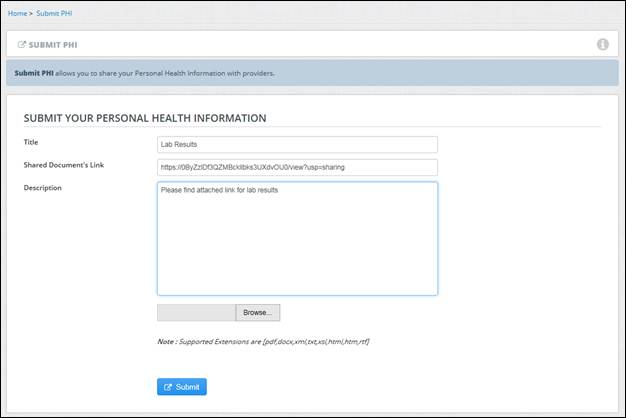
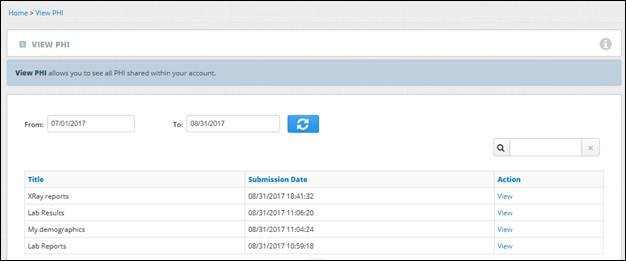
PHI Information can be submitted and viewed using the option shown in below figure.
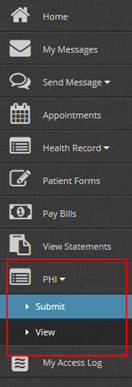
PHI information can be submitted in form of Title, description, any shared link or documents in pdf, docx, xml, txt, html formats.
PHI source can be specified in “Shared Document’s Link” field if applicable.
Submitted information can be viewed as shown in below figure.
Patient Portal helps patients to know the clinical summary, ambulatory summary information, communicate with practice using secure messages, pay the bills online, view appointments without visit to the Practice.
Activate patient to access Portal
User will be given an invitation to get activated to use the patient portal.

Click “Click on this link”. User will be redirected to the portal URL to create profile and get activated.
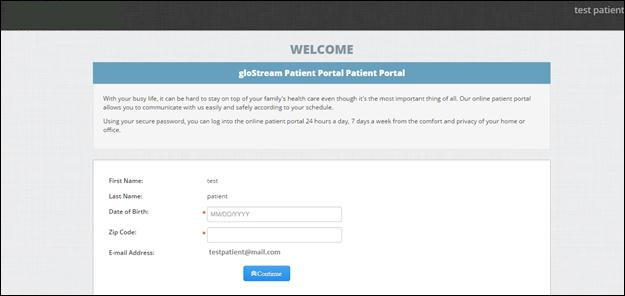
First Name, last name, Date of Birth will be defaulted. Enter Zip Code in the Zip Code field and click continue.
User will be directed to the Create Account page after click Continue.
Enter the information’s required in the Create Account page and Click create account.
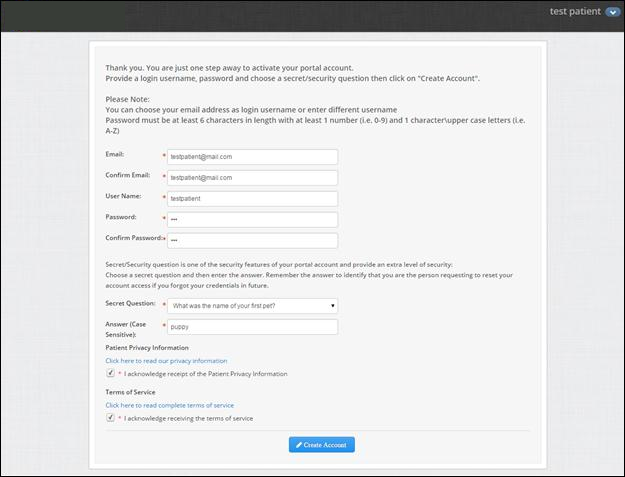
Once Account is created user will be requested to create profile on the portal > Enter mandatory information in the My Profile page and click Update Profile.
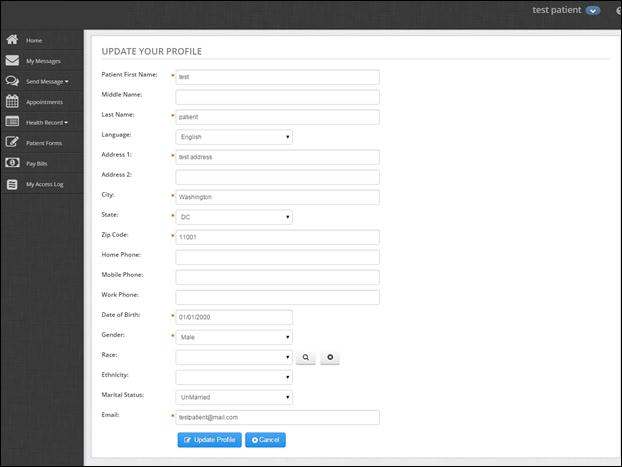
Note – User can Cancel if not required to update the profile.
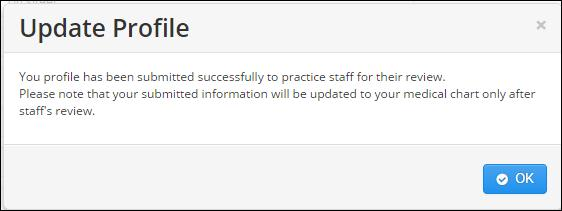
Once Update profile is done user will be given a notification message that the profile update is submitted for the review as below
Quick Activate
The patient can be quick activated from the practice. And when the user logs in to the portal for the first time, he is redirected to the Quick Activated screen.
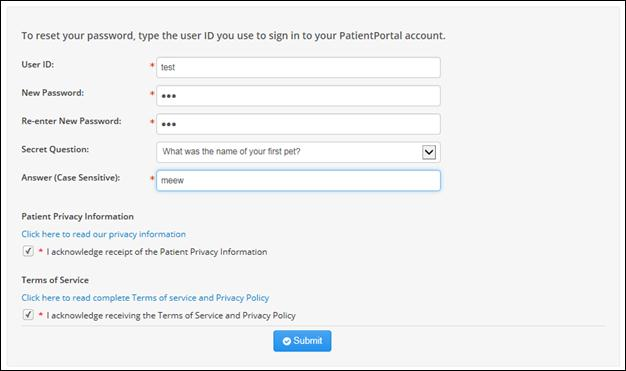
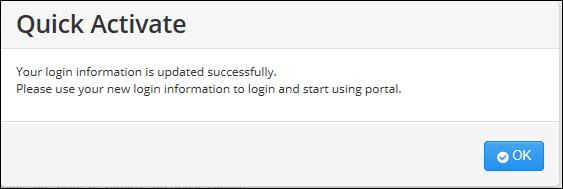
After entering the details in this screen, the portal user is forcefully redirected to the log in page.
Login Page
Patient Portal Login page have options to enter username, password with Sign in option.
Enter the username and password and click Sign In
Forgot Username
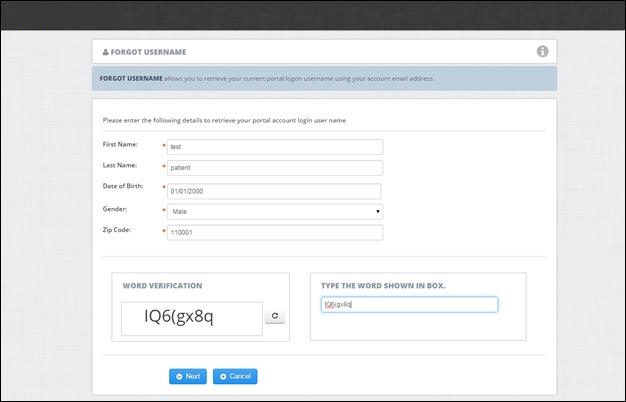
FORGOT USERNAME allows you to retrieve your current portal logon username using your account email address.
Click Forgot username hyperlink from login page. User will redirect to the Forgot username page.
Enter the details mentioned and click Next
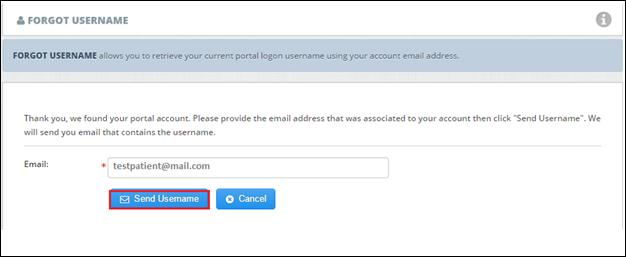
Enter the mail address and click Send Username
Forgot Password
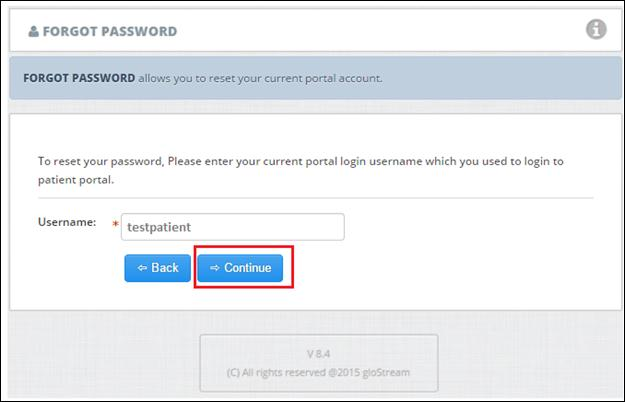
Click Forgot Password hyper link from login page. User will be redirected to the Forgot Password page.
Enter the details mentioned and click Continue
Enter the answer to the secret question which you have set on activating the account. Also enter the new password and re-enter new password and click Reset Password
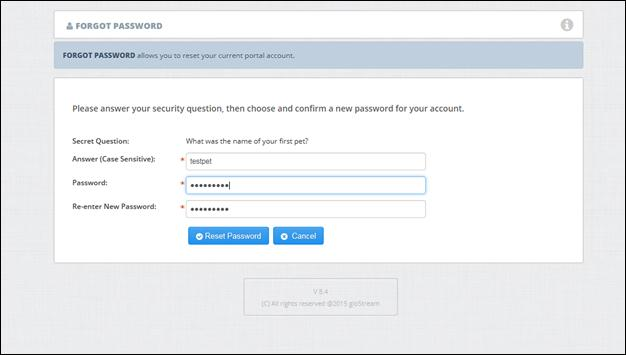
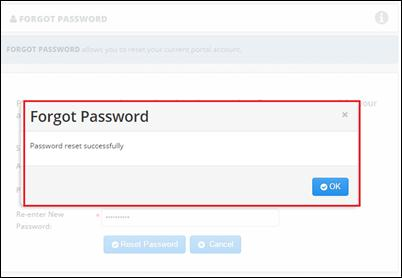
User will be given message that the password is reset successfully
Users will be taken back to the login page to login with the new password